
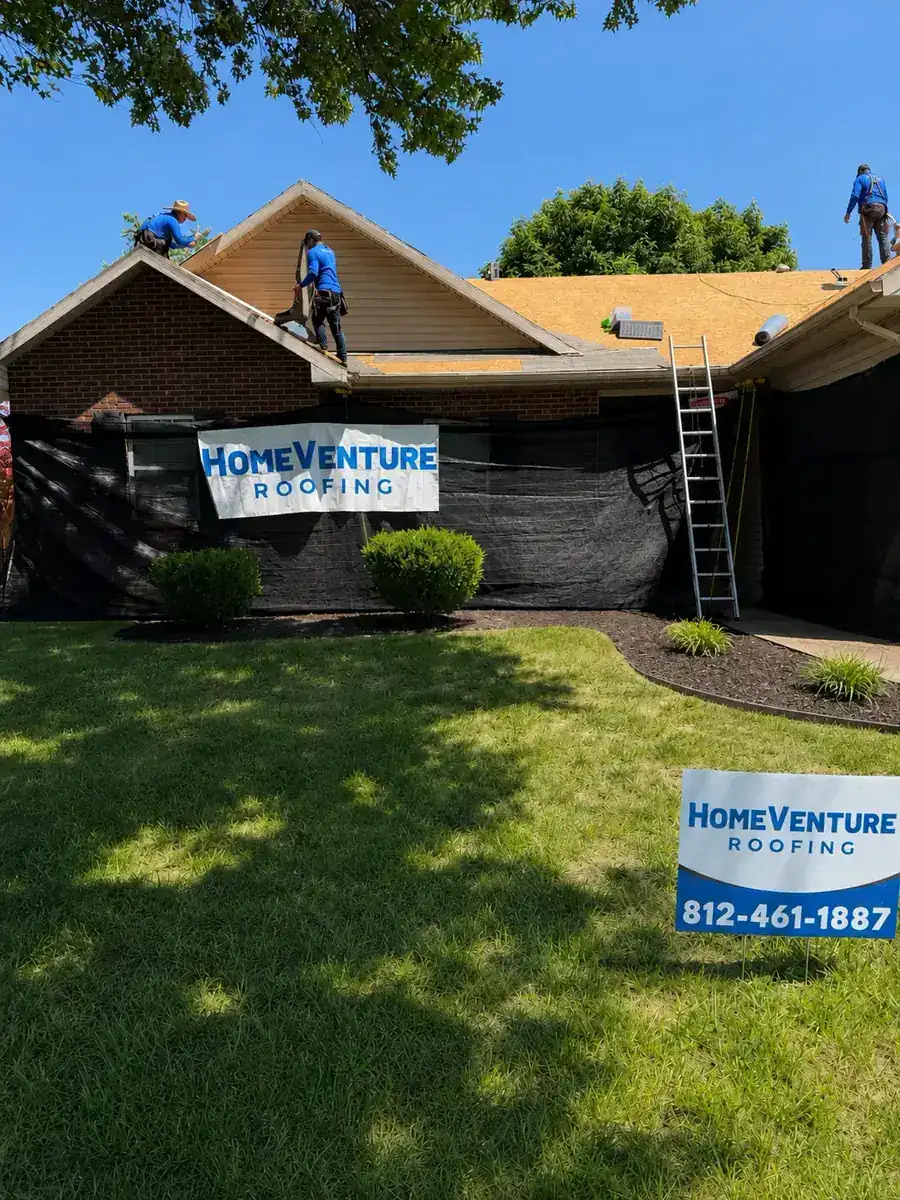
The roof you can prove was built right.
Other roofers say "trust us." We hand you the evidence.
Every HomeVenture roof goes through the same 16 documented steps. Every job, every house, every time. You see what we do at each stage, you know what to expect, and you get a complete project file when we're done. Sixteen steps. Seven written guarantees. Zero corners cut.
The 60-second version.
If you only have a minute, here is the entire HomeVenture process.
Pre-Project
Steps 1–3 · Before any work starts
- We confirm your roof materials are in stock
- We pick a real start date and add a weather buffer
- We plan how to protect your yard, plants, and gutters
Installation
Steps 4–10 · The work
- Mesh tarps protect your yard before the old roof comes off
- The old roof comes off down to the wood deck
- We check the wood deck and replace any rotten spots
- A waterproof layer covers the whole roof under the shingles
- Extra leak protection goes in every valley as a standard
- Shingles go on with six nails each for stronger wind hold
- The attic gets the right amount of vents for your roof size
- We take photos at every step so you can see the work
Completion
Steps 11–16 · After the work
- A magnet sweeps the yard and driveway for stray nails
- The crew leader checks every part of the finished roof
- You get a folder with all the photos, papers, and warranty info
- Your first yearly checkup is included free
Why this page exists.
Most homeowners only buy a new roof two or three times in a lifetime, and most of them don't really know what they're paying for. The shingles you see at the end look about the same whether the job was done well or rushed. The difference shows up later, in leaks, in warranty disputes, in the cost of repairs nobody documented.
This page is the long version. Read what we do at each of the sixteen steps below, what you should expect as a homeowner during each one, and just as importantly, what commonly gets missed. When you compare bids, this is the standard to compare against.
If anyone offers a comparable system at a better price, our Best Value Guarantee sends you a $500 check on top of the price match.
Your project, in three phases.
Your project moves through three phases over roughly seven to ten days, depending on roof size and weather.
Phase 1
Pre-Project
Steps 1–3
Scheduling, materials, staging. Happens before a single shingle comes off.
Phase 2
Installation
Steps 4–10
Tear-off, decking, dry-in, shingles, ventilation. The active work.
Phase 3
Completion
Steps 11–16
Cleanup, inspection, walkthrough, warranty packet, maintenance enrollment.
Each step below is a real checkpoint, not marketing language. You can ask any HomeVenture team member which step we're on at any time, and they'll tell you, with photos.
PHASE 1 — PRE-PROJECT
Scheduling, materials, staging. Happens before a single shingle comes off.
Step 1: Project Review & Scheduling
What we do.
We coordinate with our supply house and the weather forecast to lock in your start date based on actual material availability and a realistic install window. We provide a confirmed project timeline before any commitment is made.
What to expect.
You'll receive a call to confirm scheduling. Share any constraints upfront: closings, travel, kids' school schedules, anything that affects whether the crew can be on your property. Your start date will account for a weather buffer so we're not installing your roof in conditions that compromise the materials.
What commonly gets missed.
Scheduling without checking material availability. Promising start dates that supply timelines can't actually support. Installing in marginal weather to keep the schedule rather than protecting the roof.
Step 2: Material Delivery
What we do.
We confirm every line item on your order against your project specs: shingle product, color, underlayment grade, flashing dimensions, ventilation components, fasteners, accessories. We stage delivery to minimize disruption to your property.
What to expect.
Material delivery trucks will arrive before your start date. Materials are staged on your property in a planned location. Everything you see delivered matches the scope you approved.
What commonly gets missed.
Ordering without spec verification (and discovering the wrong color or product the day of install). No inventory check before tear-off begins. Material shortages caught mid-project, leading to mismatched batches or substitutions you didn't approve.
Step 3: Staging
What we do.
We drop off our dedicated dump trailer and tools on-site. Materials get positioned for efficient workflow. We protect your driveway and landscaping before any work starts.
What to expect.
The dump trailer is placed on your driveway. Plan to move vehicles to a side or street parking spot, and clear access paths. Your landscaping, plants, and outdoor fixtures are protected before anyone climbs a ladder.
What commonly gets missed.
No dedicated dump trailer, so debris just gets piled in the yard. No driveway or landscaping protection. No pre-work walkthrough of the property.
PHASE 2 — INSTALLATION
Tear-off, decking, dry-in, shingles, ventilation. The active work.
Step 4: Pre-Installation Verification
What we do.
The foreman inspects the existing roof one more time before any work begins. We confirm that every material on-site matches the work order and that the scope is exactly what you signed off on.
What to expect.
This is your last checkpoint. The foreman will walk the project one more time and confirm scope with you before tear-off starts. No surprises after this point.
What commonly gets missed.
Crews start tearing off without verifying that the scope is locked. No pre-install inspection of existing conditions. Material shortages discovered after the roof is already opened up.
Step 5: Yard & Property Protection
What we do.
We deploy a debris management system around the roofline perimeter to catch falling material before it ever hits your yard. We use mesh tarps, not plastic, over landscaping and grass. Mesh breathes, so sunlight and air still reach the lawn underneath instead of scorching it the way plastic does after a couple of hot days. HVAC units and outdoor fixtures get covered. We use commercial-grade magnetic nail rollers, not the consumer magnets sold at big-box stores.
What to expect.
Debris is contained before it hits the ground. Your landscaping, HVAC, and any vehicles stay shielded from the work above. The lawn under our tarps comes back green, not yellow. Magnetic sweeps cover the entire work zone before we close the project out.
What commonly gets missed.
Perimeter debris management. Material falls into landscaping, flowerbeds, and gutters. Plastic tarps thrown over the lawn that cook the grass underneath. HVAC units and outdoor fixtures left exposed. Consumer-grade magnets that miss the smaller nails ending up in tires and bare feet later.
Tied to your RockSolid coverage:
This step is backed by our Nail-Free Property Guarantee. See the guarantee page for the full terms.
Step 6: Tear-Off
What we do.
We systematically remove existing roofing material down to the decking. All debris loads into our on-site dump trailer as we work. We keep emergency tarps on standby in case weather changes during this phase.
What to expect.
This is the noisiest, most active phase of the project. Your home is never left exposed without a plan. Even if a storm rolls in unexpectedly, we have a same-day weather response. Debris doesn't pile in your yard; it's contained as we go.
What commonly gets missed.
Debris scattered across the yard and driveway throughout the day. No emergency tarp protocol for weather changes. No same-day debris removal plan.
Step 7: Decking Repair
What we do.
We inspect every inch of your roof deck once the old roofing is off. Soft spots, rot, water damage, gapped boards, structural issues. All of it gets caught and addressed before anything new goes down. Compromised decking is replaced with matching material, whether that's OSB, plywood, or 1x6 decking depending on what your home was built with. We document everything we find with photos before and after replacement.
What to expect.
Your contract includes a built-in decking allowance, set before the project starts, so we are not stopping the job and writing change orders for a couple of bad sheets. If the damage exceeds that allowance, you'll be contacted with photo documentation before any additional work is approved.
What commonly gets missed.
Damaged or rotted decking covered up and shingled over. Hidden damage ignored, then resurfaces as leaks two years later. No photo documentation of what was found, leaving you no record if disputes arise. No pre-set decking allowance, so every soft board becomes a surprise charge and a slowdown.
Why this matters in our climate:
Heavy rain, freeze-thaw cycles, and humid summers all attack older decking. Older homes often have decking with hidden water damage that only shows up when the roof is open. Skipping this step is the single most common reason a "new" roof leaks within five years.
Step 8: Dry-In
What we do.
Ice-and-water shield goes down in every valley and at every other critical area: eaves, roof-to-wall transitions, and any low-slope sections that need it. Synthetic underlayment covers the entire roof deck, as code requires, with every course lapped correctly so water tracks over the seams instead of under them. The dry-in is completed the same day as tear-off, so your home is never exposed overnight.
What to expect.
Your roof's secondary water barrier is in place before the day ends. Full-deck coverage, every lap done right, valleys protected with ice-and-water shield even where it isn't required by code.
What commonly gets missed.
Underlayment that gets lapped the wrong direction, so water runs under the seam instead of over it. Underlayment torn during install and then covered up. Dry-in not completed same-day, so the deck sits open overnight and one surprise storm can ruin the project. Builder-grade underlayment that tears easily and fails under stress.
Ice-and-water shield in every valley:
Most roofers install ice-and-water shield only at the eaves, because that is the code minimum. HomeVenture installs ice-and-water shield in every valley on every roof, even where it isn't required by code. Valleys carry the highest water volume on the roof, so this is where leak protection matters most.
Tied to your RockSolid coverage:
The dry-in is the layer your Leak-Free Assurance Guarantee is built on. Get this layer wrong and no shingle on earth will save the roof.
Step 9: Shingle Installation
What we do.
Shingles are installed exactly to manufacturer specifications and code. Manufacturer-specified starter strips run at all eaves and rakes. Ridge caps and step flashing set correctly. New pipe boots are installed every time, never reused. Valleys are laid in with proper underlayment. Nailing pattern, exposure, and zone placement match the manufacturer's published install standards. We use storm nailing (six nails per shingle instead of the minimum four) so the roof qualifies for the manufacturer's extended wind warranty.
What to expect.
Your selected shingle product and color installed exactly as approved. Every component goes in to the standards required for full manufacturer warranty coverage, including the extended wind rating that comes from proper starter strips and storm nailing.
What commonly gets missed.
Over-driven nails that cut into the shingle and void the manufacturer warranty. Generic cut three-tabs used in place of manufacturer-specified starter strips, which kills the extended wind warranty before the roof is even finished. Four-nail patterns instead of storm nailing. Old flashing and pipe boots reused instead of replaced (the most common source of leaks in the first decade of a "new" roof).
Our specifics:
We only use 4x4x8 step flashing, not the undersized 2.5x2.5x8 stocked cheaper at supply houses. Pipe boots are aluminum or siliconized rated for 50+ years, not the basic PVC and plastic boots that crack and fail in 5 to 10 years. Why these specifics matter is covered in our Why Roofs Leak guide.
Tied to your RockSolid coverage:
This step is the foundation of your Manufacturer-Backed Material Guarantee. Install the shingle wrong and the manufacturer warranty is void on day one. We install to spec so the warranty actually pays out if you ever need it.
Step 10: Ventilation
What we do.
We design balanced intake and exhaust ventilation to the manufacturer's spec for your roof. Calculated, not guessed. Depending on your home's airflow we use a combination of ridge vents, powered attic ventilators, soffit intake, and gable vents. Existing vent components are inspected and replaced if they aren't pulling their weight.
What to expect.
A ventilation system matched to your home's actual airflow needs, not whatever the crew defaults to. Proper ventilation is one of the largest factors in shingle lifespan. It directly affects how long your roof lasts before the shingles dry out and start losing granules.
What commonly gets missed.
Ridge vents installed alone, with no intake. The system runs unbalanced and the attic overheats. Existing attic exhaust fans reused without inspection even when they're already failing. No airflow calculation done at all. The wrong mix of vent types stacked on the same roof, which fights itself instead of moving air.
PHASE 3 — COMPLETION
Cleanup, inspection, walkthrough, warranty packet, maintenance enrollment.
Step 11: House Cleanup
What we do.
We blow-clean every gutter, window well, and flower bed touched by the work. Our magnetic nail sweeps are commercial-grade, not the consumer magnets sold at big-box stores. We leave your property cleaner than we found it.
What to expect.
Thorough debris removal from every surface. Commercial-grade magnetic sweeps across the lawn, driveway, and walkways. A final walkthrough to catch anything remaining before we leave.
What commonly gets missed.
Quick sweep with basic consumer-grade equipment that misses small nails. Nails left in the lawn, flower beds, and driveway. Gutters and window wells ignored, with leaves and debris left where they fell.
Step 12: Material & Trailer Removal
What we do.
We load and haul all scrap, packaging, and debris. The dump trailer leaves your property promptly. No pallets, no leftover shingles, no stray materials.
What to expect.
Your property is completely cleared. The trailer is removed without sitting on your driveway for days afterward.
What commonly gets missed.
Leftover materials in the driveway for days or weeks. Debris scattered after cleanup. Dump trailers left on the property longer than necessary.
Step 13: Final Quality Verification
What we do.
I conduct a systematic top-to-bottom inspection of every penetration, every piece of flashing, every line of ridge, every valley, every gutter detail. If I find anything I am not satisfied with, I flag it on the spot and have the crew come back out to fix it before we close the project. We create a photo record of the completed roof and add it to your project file.
What to expect.
A thorough final inspection before sign-off. Every component verified by the owner of HomeVenture, not by you. Most homeowners aren't roofing experts, and they shouldn't have to be. That's the whole point of having me do the final inspection on our own work and hold ourselves to the standard before you ever have to ask. Photo documentation stays with you, in case you ever need it for an insurance claim, a home sale, or a warranty question.
What commonly gets missed.
No final inspection. The crew packs up and leaves. Flashing or penetration issues go undetected until they leak. Quality control becomes the homeowner's problem instead of the contractor's. No photo record of the completed work.
Tied to your RockSolid coverage:
This step backs your 10-Year Transferable Workmanship Guarantee. If we caught and fixed it before closeout, it's never going to surface as a workmanship claim later.
Step 14: Project & Warranty Review
What we do.
I walk the completed job with you and explain what was done. You receive your manufacturer warranty documentation on the spot. We review coverage details, duration, and contacts so you know exactly what's covered and how to use it.
What to expect.
A face-to-face review of your completed roof. Warranty documentation in your hand the day the project closes. Clear understanding of what your coverage actually includes.
What commonly gets missed.
Warranty paperwork mailed weeks later, or never. No walkthrough or explanation of the work. Homeowners left unclear on what's actually covered when something does go wrong later.
Step 15: Closeout
What we do.
We review and sign off on the final invoice with you. No surprise charges, no line items you weren't expecting. You receive a complete project file with photos, material specs, warranty documents, and records of any change orders. Digital and hard copy provided on request.
What to expect.
Transparent final billing. A complete documentation package you keep for the life of the roof. Your records are organized and accessible for resale, for insurance, for warranty claims.
What commonly gets missed.
Surprise charges on the final bill that weren't discussed at sign-off. No project documentation provided. Records scattered, unavailable, or simply nonexistent.
Step 16: Maintenance Program Scheduling
What we do.
Every new roof comes with the first year of our HealthyRoof Program included. That covers a full inspection, a gutter check, and priority scheduling for any storm-related needs in the first 12 months. Additional years of HealthyRoof coverage can be purchased to keep the program running for the life of the roof.
What to expect.
A scheduled check-in on your roof's condition in year one. Fast response if a storm hits. An ongoing relationship with the roofer who installed your roof, not a hand-off into the void. If you want continued annual inspections after year one, you can extend coverage at any time.
What commonly gets missed.
No follow-up after installation. Once your check clears, you're on your own. Minor issues become major problems because nobody comes back to look. Storm response goes to whoever knocks on your door first instead of the team that knows your roof.
Tied to your RockSolid coverage:
Even outside of HealthyRoof, every HomeVenture roof carries the Free Post-Storm Inspection Guarantee. If a major storm hits the area, you call us and we come out to verify nothing was damaged.
Closeout file: standard roofer vs HomeVenture.
What you actually walk away with at the end of the project — line by line.
| Standard roofer closeout | HomeVenture closeout file |
|---|---|
| Verbal "we're done, the roof looks great" | In-person walkthrough with the foreman, complete project file in hand |
| Manufacturer shingle warranty paperwork mailed later (if at all) | All manufacturer warranty paperwork pre-organized and included in your file |
| No installation photos | Pre-install photos, decking documentation, dry-in coverage, install progress photos at every major stage |
| No ventilation documentation | Calculated ventilation requirements specific to your home, with the math shown |
| Material specs you'd have to ask for | Material specs included — shingle product, underlayment, flashing, fasteners, ventilation components |
| Vague workmanship promise | Seven written guarantees included, terms published in plain English |
| Nothing to show a future buyer | Documented installation records that transfer with the 10-year workmanship warranty when you sell |
| Property cleanup as a verbal claim | Commercial-grade magnetic sweep verified before closeout, backed by the Nail-Free Property Guarantee |
The proof is the process.
Every step above produces a piece of evidence that goes into your project file.
- Pre-install photos of the existing roof and decking
- Decking damage photos with before-and-after change-order documentation
- Dry-in coverage photos showing full underlayment, not partial
- Install-in-progress photos at each major stage
- Ventilation calculations specific to your home
- Material specs for every component installed
- Manufacturer warranty documentation delivered on the day of closeout
- HealthyRoof inspection records added every year going forward
At the end of the project you don't have to take our word for anything. You can see what we did, when we did it, and how it was installed, for the entire life of the roof.
Every HomeVenture replacement also includes the first year of our HealthyRoof annual maintenance program at no additional cost.
That's what we mean when we say the roof you can prove was built right.
What homeowners say.
"Presentation and proposal were very complete. It included details, and pricing of alternative materials; even the sealing products, nailing procedures were spelled out. Owner (Justin) was able to answer and address all questions and concerns. Home Venture was not necessarily the lowest bid, but we went with them after considering the professional, and comprehensive proposal… Installers did not disappoint. Crew worked professionally and efficiently."
Ready to see this process applied to your home?
Schedule a free roof inspection. We'll walk your roof, document what we find, and show you exactly what your project would include, start to finish, step by step.
Backed by the RockSolid Roof Guarantee. Seven written guarantees included with every full HomeVenture roof replacement. Repair, gutter, siding, and flat roof projects carry their own written workmanship terms spelled out in the signed proposal.